The first thing that went wrong with our dual RTX 5090 build was GPU sag. Two 5090 Founders Edition cards weigh over 2kg each. The PCIe slot is not designed to support that much cantilevered weight, especially with heavy waterblocks replacing the stock coolers. Within a week of the water cooling build, GPU 2 had visibly drooped 3mm at the far end. That is enough to stress the PCIe connector and eventually cause intermittent contact issues.
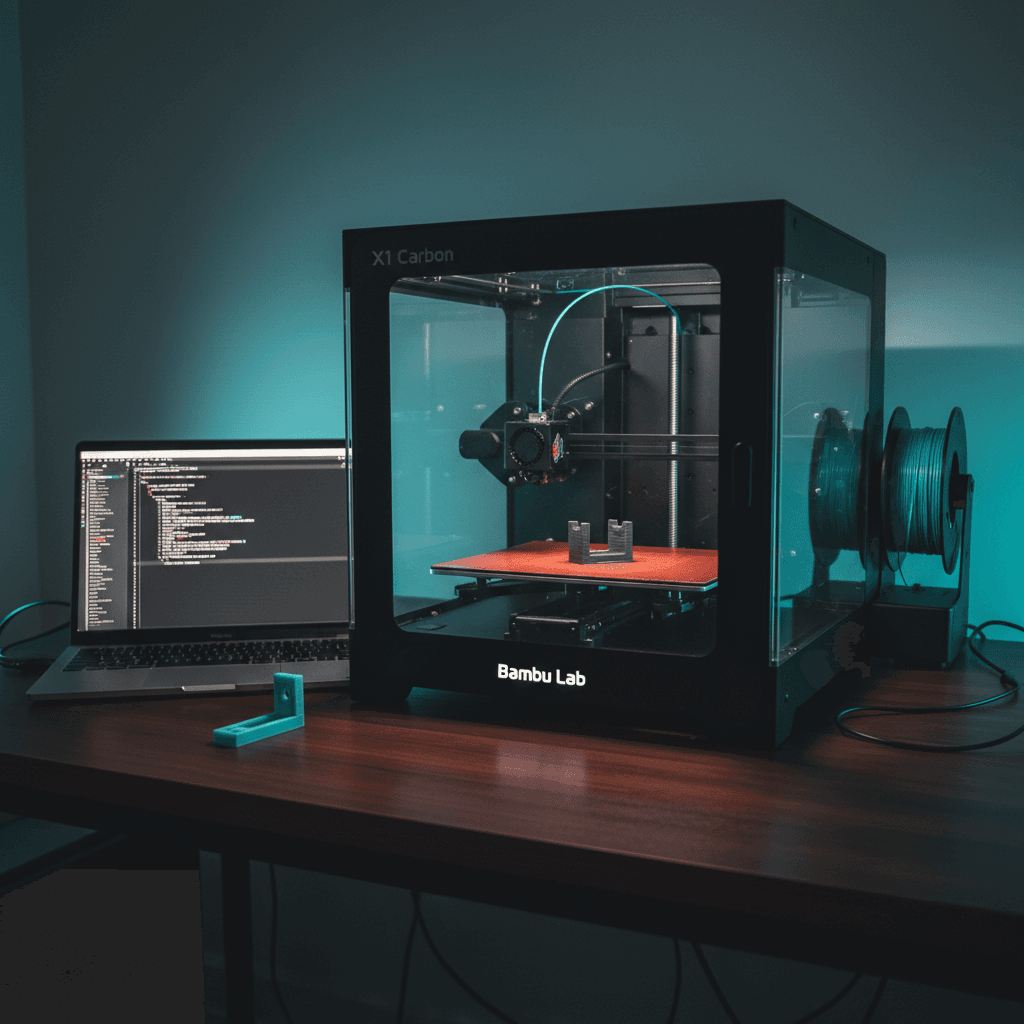
We could have ordered a GPU support bracket from Amazon. Most of them are universal fits that sort of work. Instead, we described the exact dimensions to Claude, had it write OpenSCAD code for a custom bracket, and printed it in PETG on our Bambu Lab P1S. Total time from problem to installed part: 94 minutes. Total material cost: $0.43.
That was the moment we realized we had built something more valuable than a 3D printer. We had built a custom parts manufacturing pipeline.
The Workflow: Describe, Generate, Print, Install
Here is exactly how we go from "I need a part" to "it is installed" without opening a CAD program or browsing Thingiverse.
Step 1: Describe the part to AI. We tell Claude what we need in plain English. For the GPU sag bracket, the prompt was roughly: "I need a support bracket that sits on the bottom of the case, reaches up 142mm to contact the bottom edge of the GPU waterblock, has a 4mm wide contact surface with a slight curve to distribute pressure, and a wide 40mm base for stability. The base should have two M3 screw holes spaced 30mm apart."
Step 2: Claude writes OpenSCAD code. OpenSCAD is a programmatic CAD tool. Instead of dragging shapes around in a visual editor, you write code that defines geometry. This is perfect for AI generation because the output is text, it is deterministic, and you can parameterize everything. Claude generates the full .scad file, including comments explaining each dimension.
Step 3: Export to STL. We render the OpenSCAD file and export the mesh as an STL. Quick visual inspection in the OpenSCAD preview to confirm the geometry looks right.
Step 4: Slice in Bambu Studio. Import the STL into Bambu Lab's slicer software. Select the material profile (PETG for structural parts, PLA for prototypes), set infill to 40 to 60 percent for load bearing parts, orient the part for optimal layer adhesion relative to the stress direction.
Step 5: Print on the P1S. Hit print. The Bambu P1S handles first layer calibration automatically, monitors for adhesion issues, and sends a notification to our phone when the print is done.
Step 6: Install and test. Remove supports if any, test fit, install. If the fit is off, adjust one parameter in the OpenSCAD code and reprint. Iteration cost is pennies.
What We Have Printed So Far
The GPU sag bracket was just the start. Here is a running list of parts we have designed and printed for our infrastructure:
Cable management clips. Custom clips sized to our exact cable diameters. Server grade cables are thicker than consumer cables, and off the shelf clips either do not grip or are too tight. We designed clips with a press fit snap that holds 8 gauge silicone wire without tools.
Rack mount brackets. Our 5090 workstation lives in a modified open frame rack. The case needed custom brackets to mount at the right height for airflow. We printed L brackets with integrated cable routing channels that bolt to standard 19 inch rack rail holes.
Ventilation grilles. The custom loop has three 360mm radiators. Two mount internally, one mounts externally. The external radiator needed a dust filter grille sized to the exact case cutout. We designed a honeycomb pattern grille with a magnetic mounting frame. The magnet recesses are printed into the frame, and we press fit 6mm neodymium magnets into them.
Reservoir mounting bracket. The D5 pump reservoir combo did not have a mounting point that worked with our case layout. We designed a bracket that clamps to the reservoir body and bolts to the case chassis at two points.
Fan shroud adapter. We needed to mount 120mm fans in a space that was cut for 140mm fans. Instead of buying a 140mm to 120mm adapter plate, we printed one with integrated anti vibration mounts.
SSD mounting tray. Our system has four NVMe drives. The motherboard has two M.2 slots, the other two run off a PCIe adapter card. The adapter card needed a custom mounting solution in the case. We printed a tray that holds the adapter at the exact angle needed for the PCIe slot while keeping the SSDs in the airflow path.
That is 8 custom parts. Zero of them exist as off the shelf products in the exact dimensions we needed. Total material cost for all 8: under $12.
Why PETG and Not PLA
PLA is the most common 3D printing material. It is easy to print, comes in every color, and produces sharp details. It is also unsuitable for anything near a heat source.
PLA has a glass transition temperature of around 60C. Inside a computer case running dual 5090s, ambient air temperature easily reaches 45 to 50C near the radiators, and component surface temperatures are much higher. PLA parts soften and deform at these temperatures. We learned this the hard way with an early PLA prototype that warped within two days.
PETG has a glass transition temperature of around 85C, more than enough headroom for our use case. It is also more flexible than PLA, which matters for press fit parts like cable clips. The tradeoff is that PETG is slightly harder to print. It strings more, requires slower speeds, and is more sensitive to moisture. The Bambu P1S handles all of these challenges well, especially with the enclosed build chamber.
For parts that are purely decorative or prototypes that will not live in the case, we still use PLA. For anything structural or near heat, PETG is the only option.
The Bambu P1S: Why This Printer
We chose the Bambu Lab P1S for three reasons:
Auto calibration. The P1S does automatic first layer calibration, flow calibration, and vibration compensation. This eliminates hours of manual tuning that other printers require. When you are printing functional parts and need them now, spending 30 minutes leveling a bed is not acceptable.
AMS multi material. The Automatic Material System lets us load four filament spools and switch between them mid print. We use this for multi color parts (like labels printed directly into brackets) and for printing dissolvable support material when geometry requires it.
Enclosed chamber. PETG benefits from a stable, warm build environment. The P1S enclosure keeps the chamber at a consistent temperature, reduces warping, and filters particulates from the air. Since this printer sits in the same room as our workstation, air quality matters.
Speed. A typical bracket prints in 45 to 90 minutes on the P1S. On our old Ender 3, the same part took 3 to 5 hours. When you are iterating on a design and need three test prints to get the fit right, speed is the difference between finishing in an afternoon and finishing in three days.
The Bigger Point: Own the Entire Pipeline
Here is why this matters beyond saving a few dollars on brackets.
When you own the hardware (the workstation), the design tool (AI), and the manufacturing capability (the printer), you can solve problems in minutes that would otherwise take days of searching, ordering, and waiting for delivery. You are not constrained by what exists in a catalog. You manufacture exactly what you need, when you need it.
This is the same philosophy we apply to software. We do not look for off the shelf SaaS tools that sort of fit. We build custom systems that fit exactly. The 3D printer is the physical equivalent of that approach.
The AI piece is what makes it accessible. Five years ago, designing a custom bracket required knowing CAD software. Today, you describe what you need in English, and AI generates the geometry. The barrier to entry for custom manufacturing is now a $400 printer and access to a language model.
Same Loop, Different Scale
The workflow we use for printing server parts is identical to the workflow we use for building software:
- Identify the problem. Something does not fit, does not exist, or does not work well enough.
- Describe the solution. Plain language specification of what the solution needs to do.
- Generate the first version. AI writes the code, whether that is OpenSCAD for a bracket or TypeScript for a web app.
- Test and iterate. Print it, install it, check the fit. Or deploy it, test it, check the behavior.
- Ship it. Install the final part. Or push to production.
The tools are different. The process is identical. And the principle is the same: do not wait for someone else to build what you need. Build it yourself, faster and better.
If you have a hardware or software problem that off the shelf solutions do not quite solve, that is exactly where we operate.